5 Oct 2026 · 5 weeks ago · notes revised today
Oak Starter Cottage: A Compact Minecraft House Blueprint
Build a practical oak cottage with a steep spruce roof, bright windows, and room for the essentials of a new survival base.
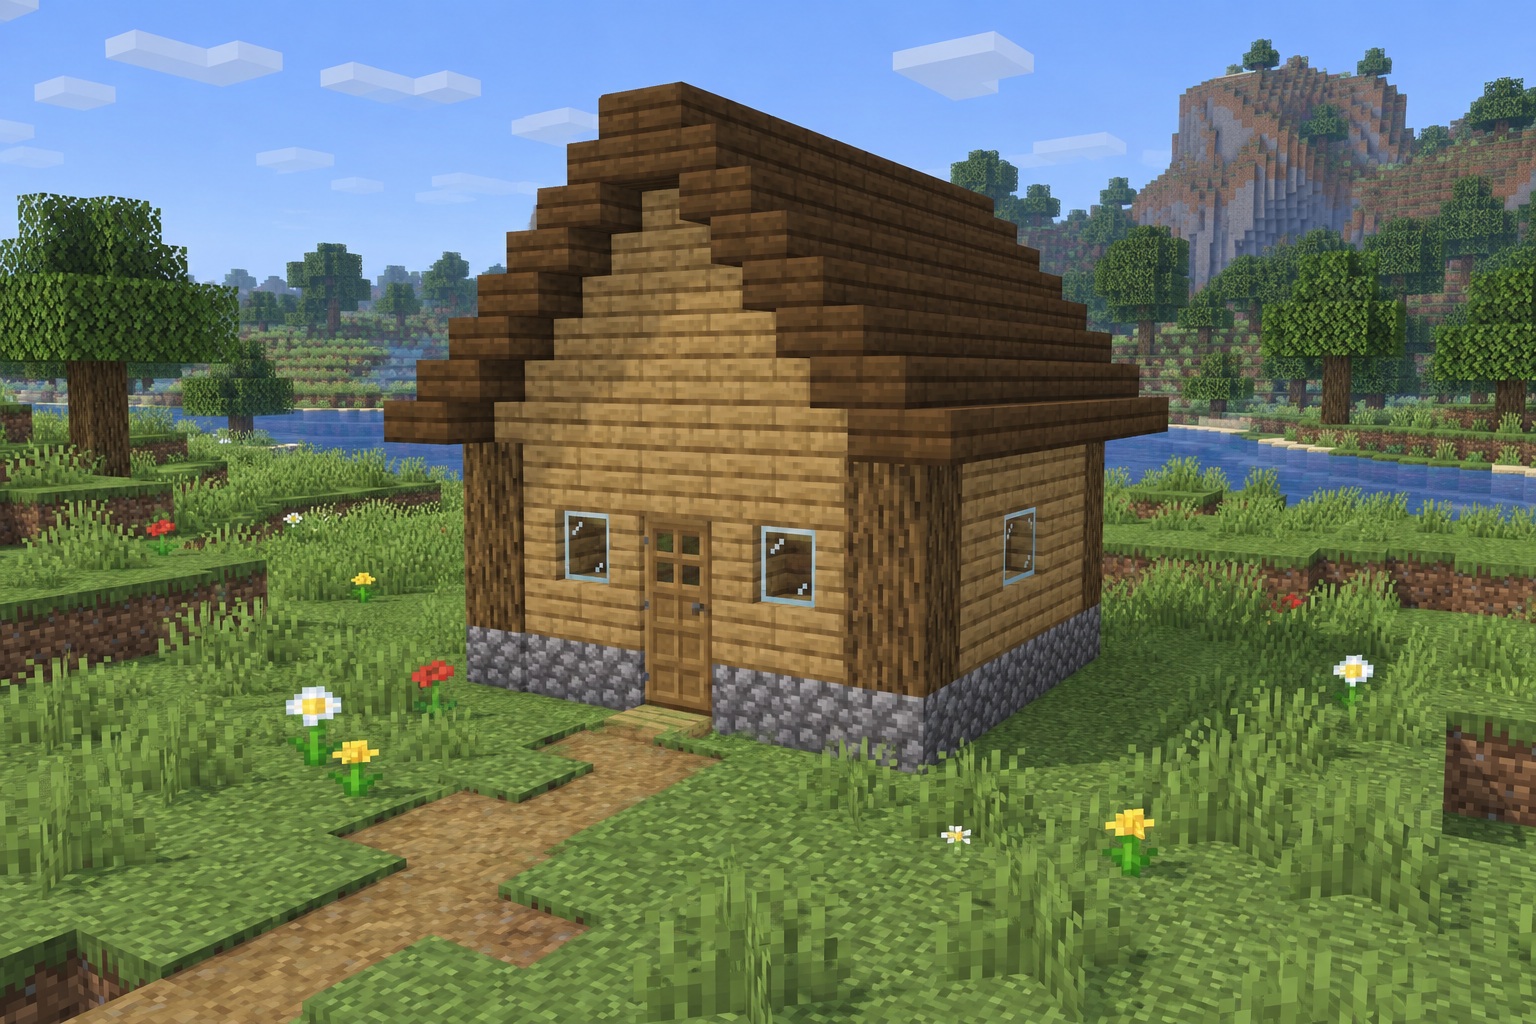
A starter house can be small without looking temporary. This oak cottage gives you a proper front door, windows on every side, and a steep spruce roof that makes it feel at home beside a village path. The contrast between pale oak walls and dark roofing adds character without demanding a large collection of materials.
The walls occupy 7 × 7 blocks, enclosing a 5 × 5 room. Allow 9 × 9 blocks for the roof overhang. From the bottom of the foundation to the top of the ridge, the build is 8 blocks tall. The interior is open to the roof; this version has no loft or ceiling.
The numbered diagrams define exact placement. Hero and gallery images are AI-generated appearance references, not in-game screenshots; small details and block spacing may vary.
Materials
- **24 cobblestone blocks:** the foundation perimeter.
- **94 oak planks:** 25 floor blocks, 51 wall blocks, and 18 gable infill blocks.
- **12 oak logs:** four corner posts, each 3 blocks high.
- **72 spruce stairs:** eight roof runs of 9 stairs each.
- **9 spruce planks:** the full-block roof ridge.
- **7 glass blocks:** two front windows, three rear window blocks, and one window on each side.
- **1 oak door.**
- **1 bed**, **1 crafting table**, **1 furnace**, and **1 chest** for the suggested interior.
- **1 lantern** for the center of the room.
- Temporary dirt for roof access; remove after building.
Counts describe placed blocks and items, not raw crafting ingredients. Optional paths, flowers, and terrain leveling are extra.
How to build
1. Set the foundation and enclose the room
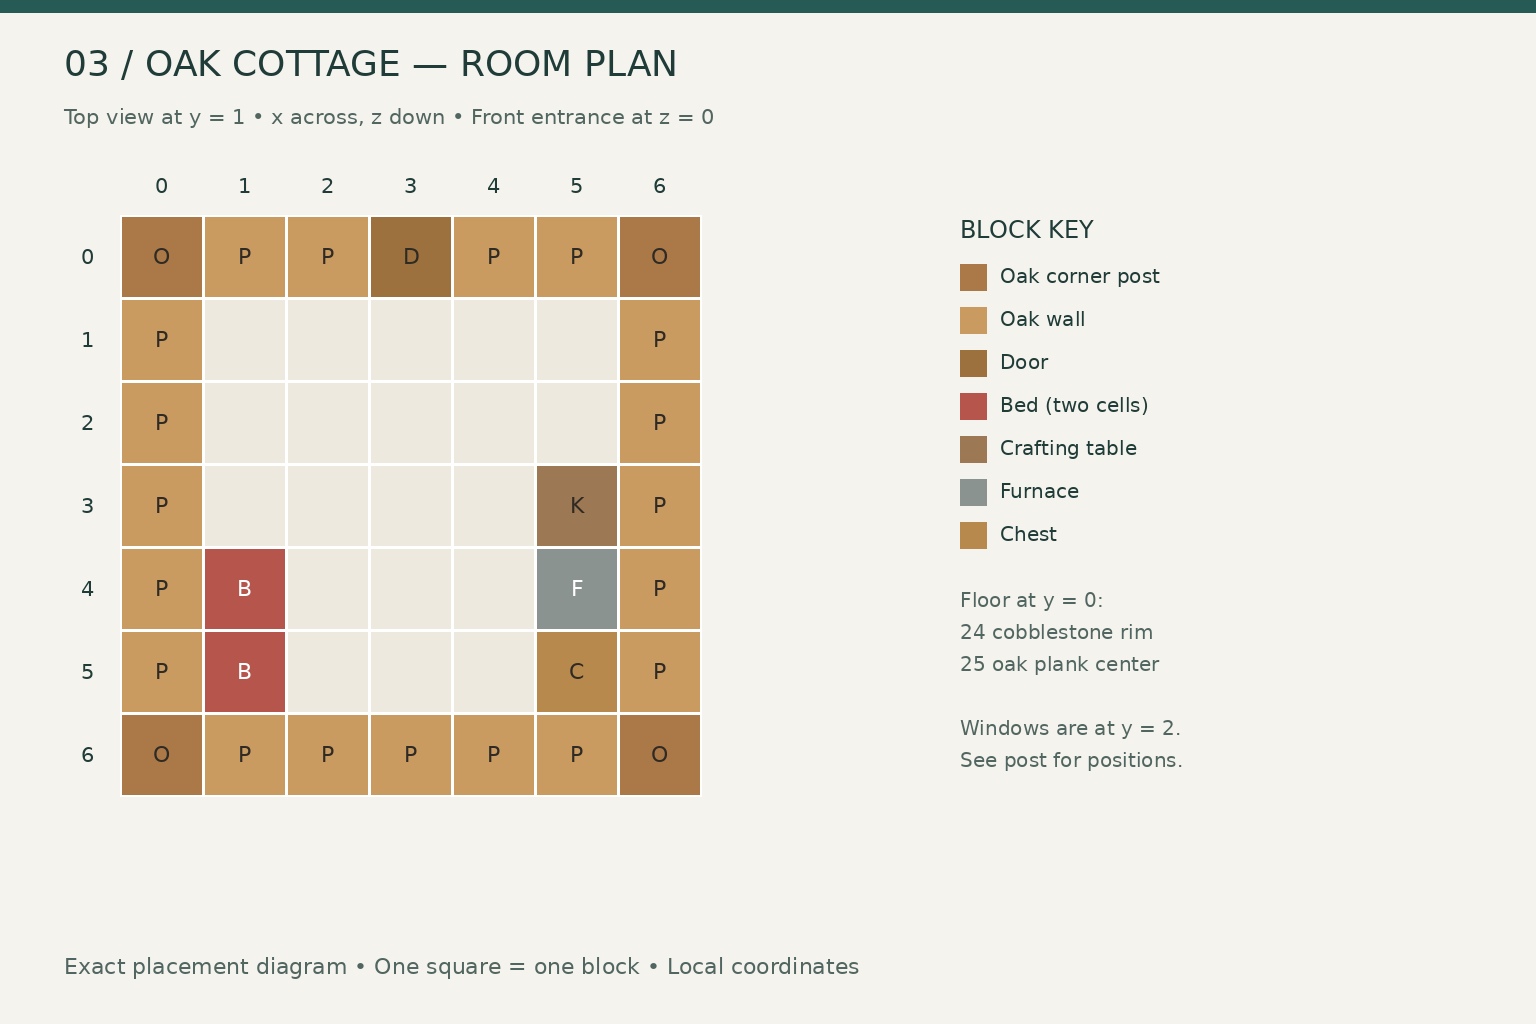
Use local coordinates: x = 0–6 runs left to right when facing the entrance, and z = 0–6 runs from the front to the back. The floor and foundation occupy y = 0. Set this layer into the ground so its top is level with the surrounding walking surface.
Fill the 7 × 7 perimeter at y = 0 with cobblestone, using 24 blocks. Fill the central 5 × 5 area with 25 oak planks. This leaves a solid floor with a stone border beneath the walls.
At each corner—(0,0), (6,0), (0,6), and (6,6) in x/z—stack three vertical oak logs at y = 1–3. Fill the rest of the perimeter at these three heights with oak planks, except for these openings:
| Feature | x | z | y | | --- | --- | --- | --- | | Front door | 3 | 0 | 1–2 | | Front windows | 1 and 5 | 0 | 2 | | Rear window | 2–4 | 6 | 2 | | Left window | 0 | 3 | 2 | | Right window | 6 | 3 | 2 |
Install the door in its two-block-high opening. Fill each window cell with a full glass block. There is an oak plank above the door at y = 3; the windows also retain a plank above and below them.
The resulting wall layer is three blocks high. Check that the entrance opens into the middle of the room and that the full 5 × 5 interior remains clear before roofing.
2. Build the gable roof and fit out the interior
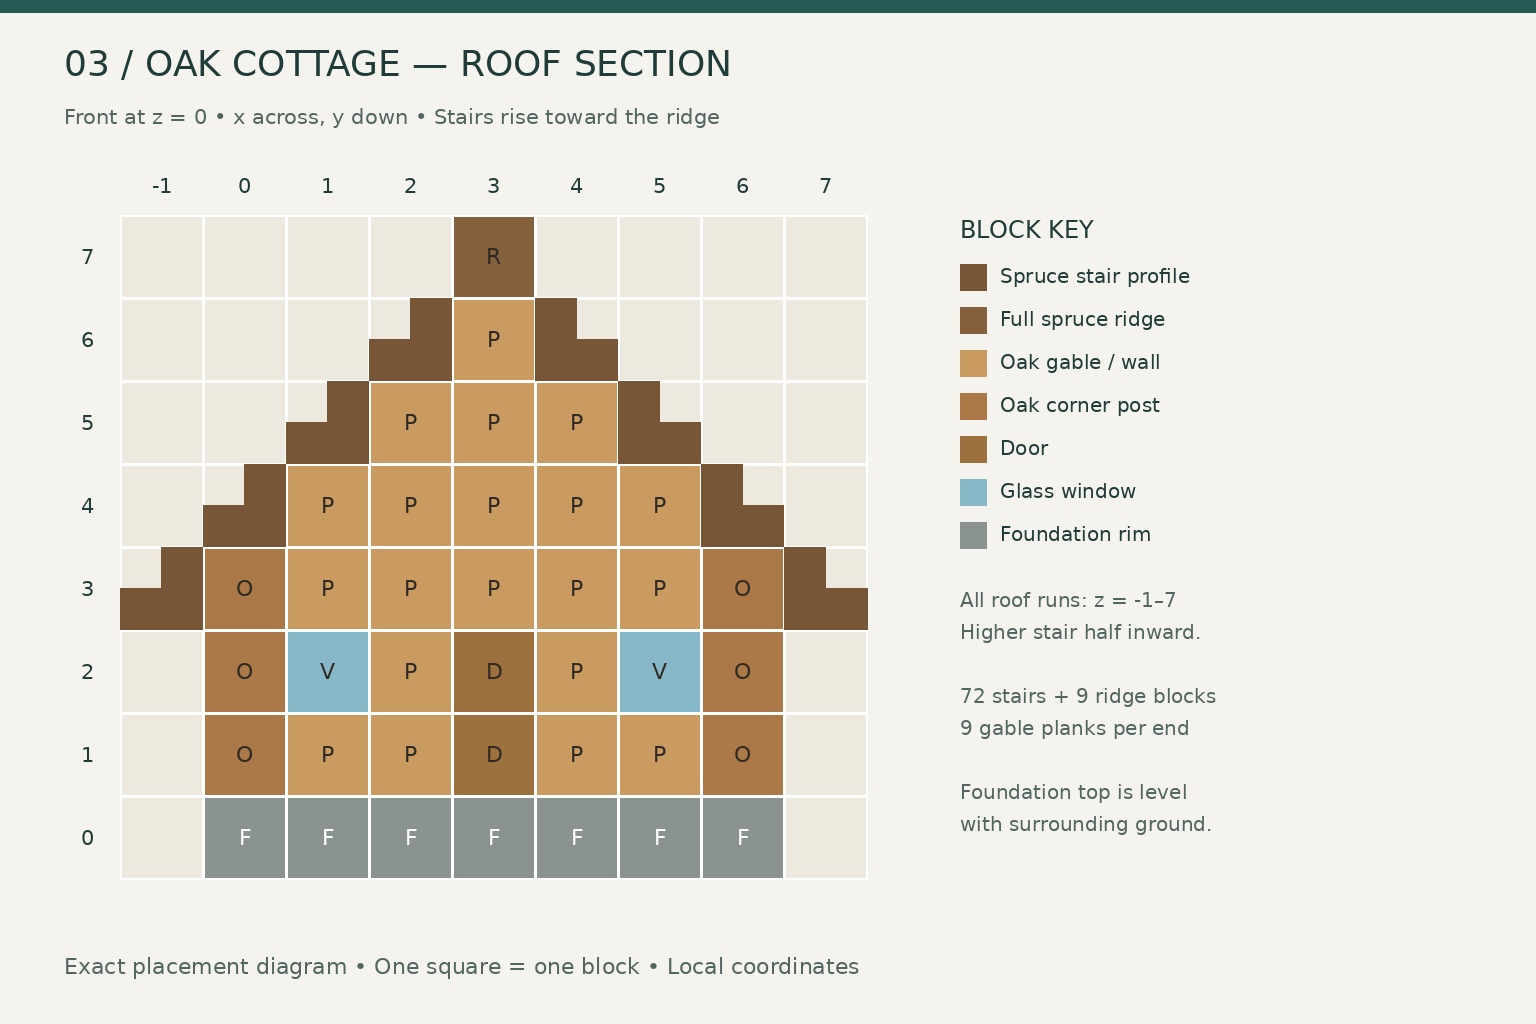
The roof ridge runs front to back. Every roof run extends along z = -1–7, giving a one-block overhang beyond both gable ends. Use normal, bottom-half spruce stairs throughout, with their higher half toward the center ridge.
| Roof course | x positions | y | Quantity | | --- | --- | --- | --- | | Outer eaves | -1 and 7 | 3 | 18 spruce stairs | | Second course | 0 and 6 | 4 | 18 spruce stairs | | Third course | 1 and 5 | 5 | 18 spruce stairs | | Fourth course | 2 and 4 | 6 | 18 spruce stairs | | Ridge | 3 | 7 | 9 full spruce planks |
Work upward from the eaves. On the left slope, each stair rises toward larger x; on the right slope, it rises toward smaller x. Keep all stairs within one run aligned the same way. The diagram shows the actual stair profile rather than treating a stair as a full cube.
Close the triangular gaps above the front and rear walls with oak planks. At both z = 0 and z = 6, place five planks at y = 4, x = 1–5; three at y = 5, x = 2–4; and one at y = 6, x = 3. That is 9 gable blocks per end, or 18 total. Do not fill the room between the gables: leave that space open beneath the roof.
For a practical interior, put the bed along the left rear wall, occupying x = 1, z = 4–5, y = 1, with its pillow toward the back. Place a crafting table at (5,1,3), a furnace at (5,1,4), and a chest at (5,1,5), using x/y/z order. Face their useful sides into the room and leave the block above the chest clear.
Hang the lantern beneath the center ridge block at x = 3, z = 3; the lantern occupies y = 6. Remove your temporary building blocks. Walk from the door to the bed and workstations, then inspect both gables from outside for any missed holes.
Gallery
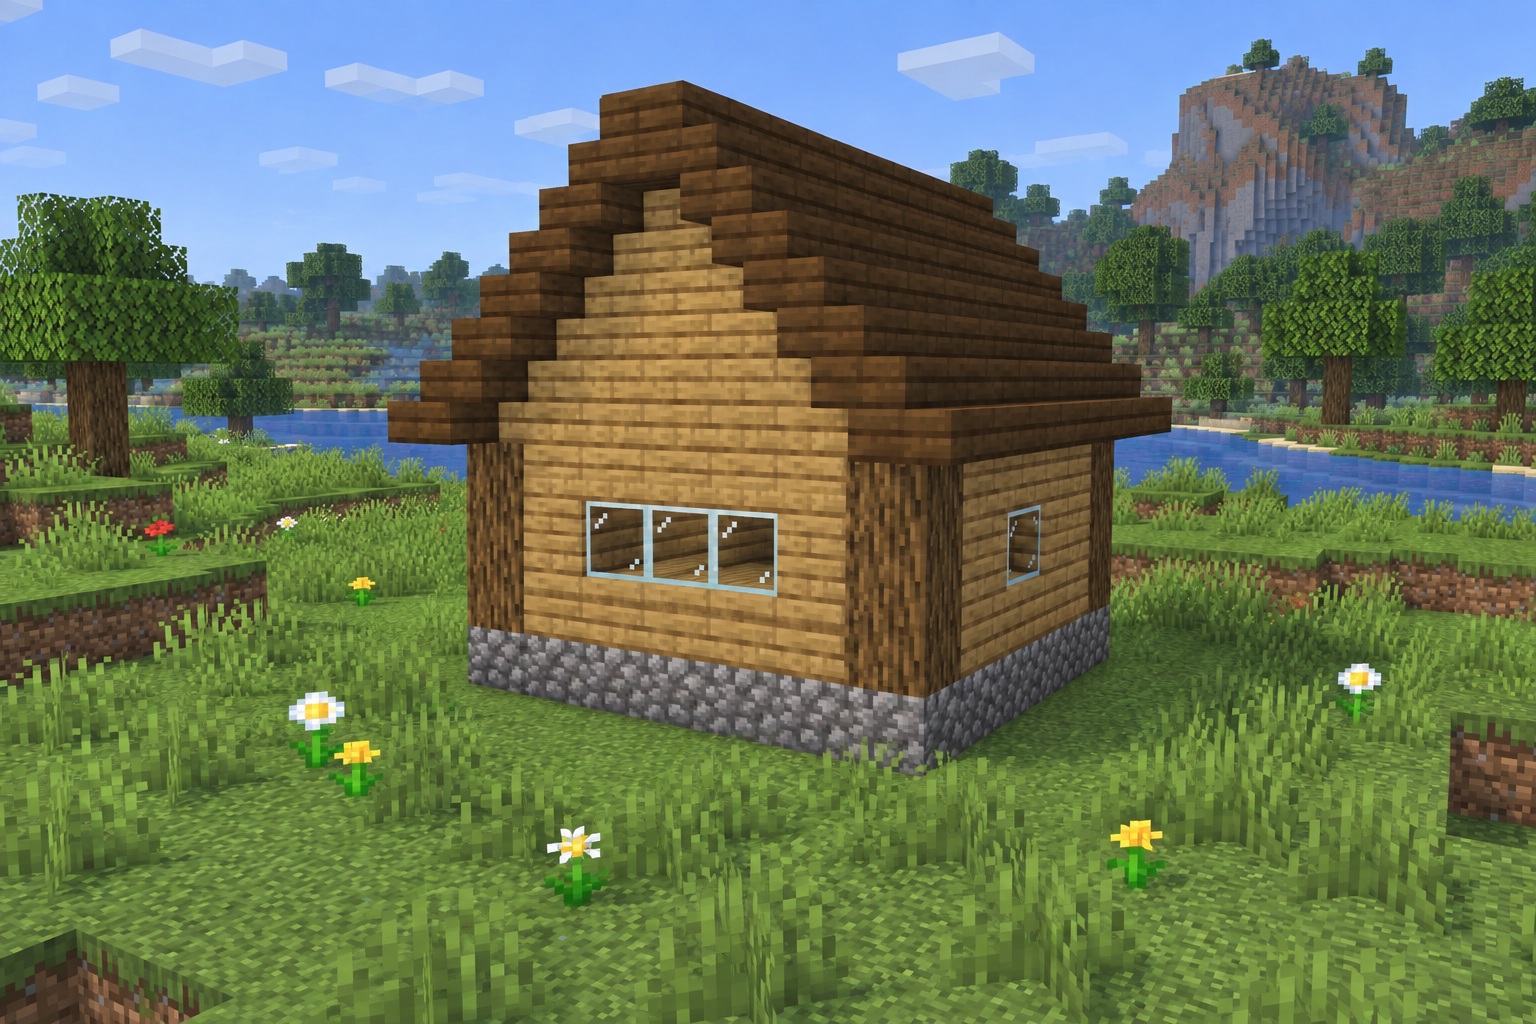
The roof gives this small square house its silhouette. Keep nearby fences and planting low so the timber corners remain visible.
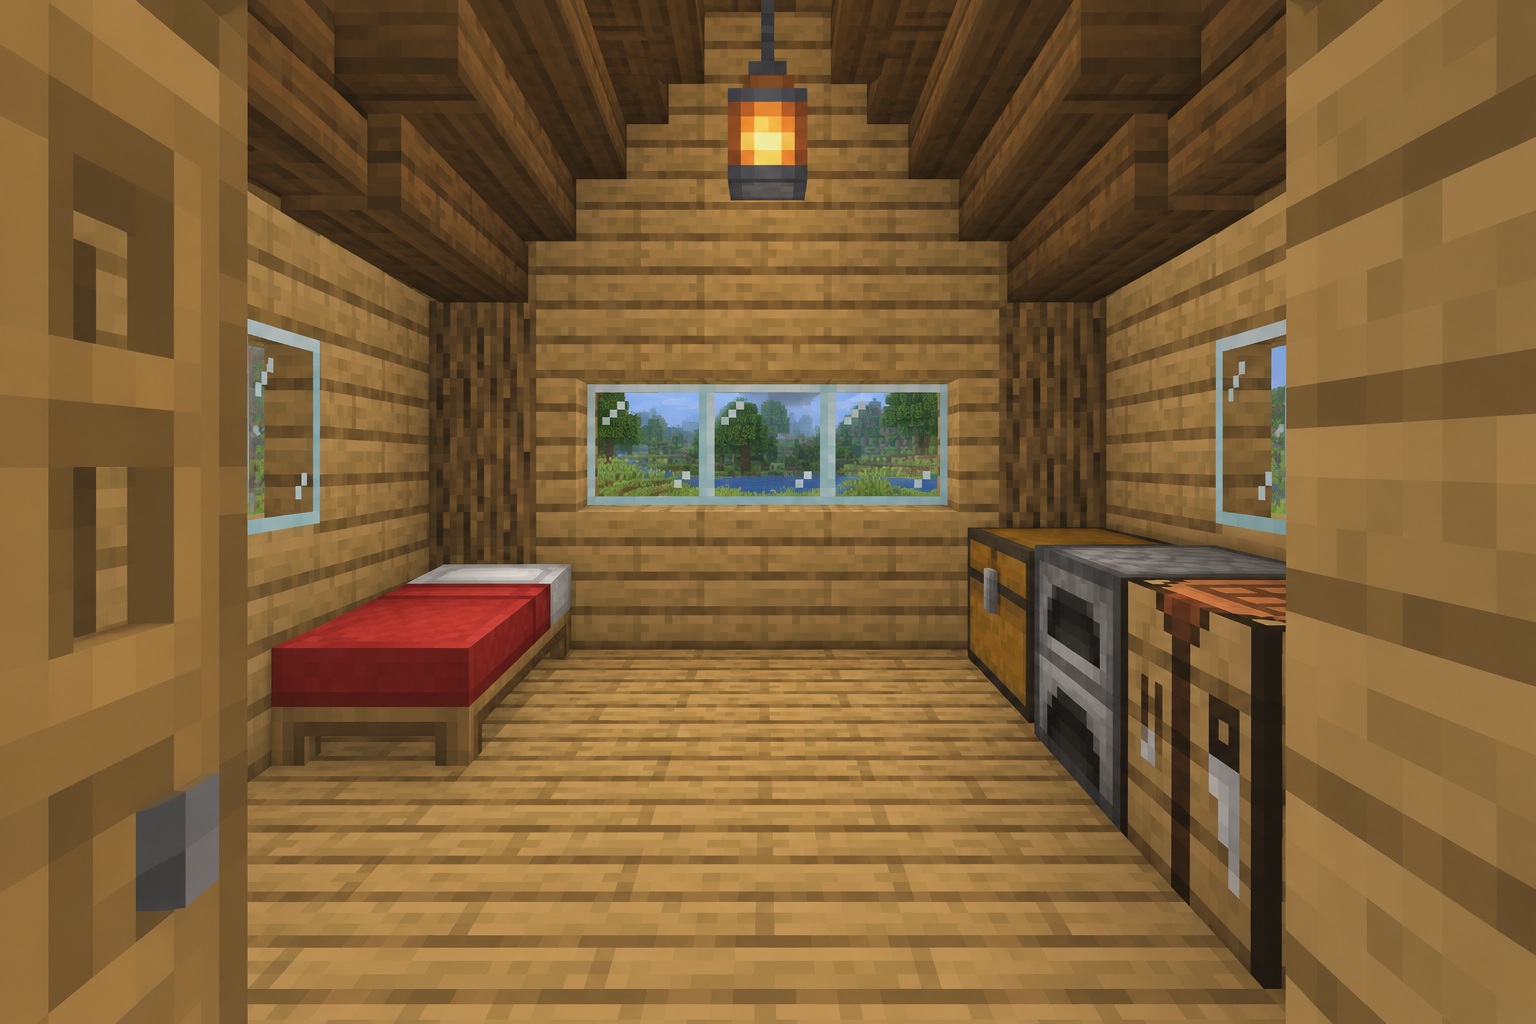
A clear center aisle keeps the compact room usable. The bed sits to the left at the back, while crafting and storage share the right side.
Leave a note
Notes are submitted for moderation and are not published automatically.