10 Aug 2026 · 3 months ago · build of the week
Simple Timber Footbridge: A Minecraft River-Crossing Blueprint
Connect two grassy banks with a straight spruce-plank bridge, oak railings, and a comfortable three-block-wide walkway.
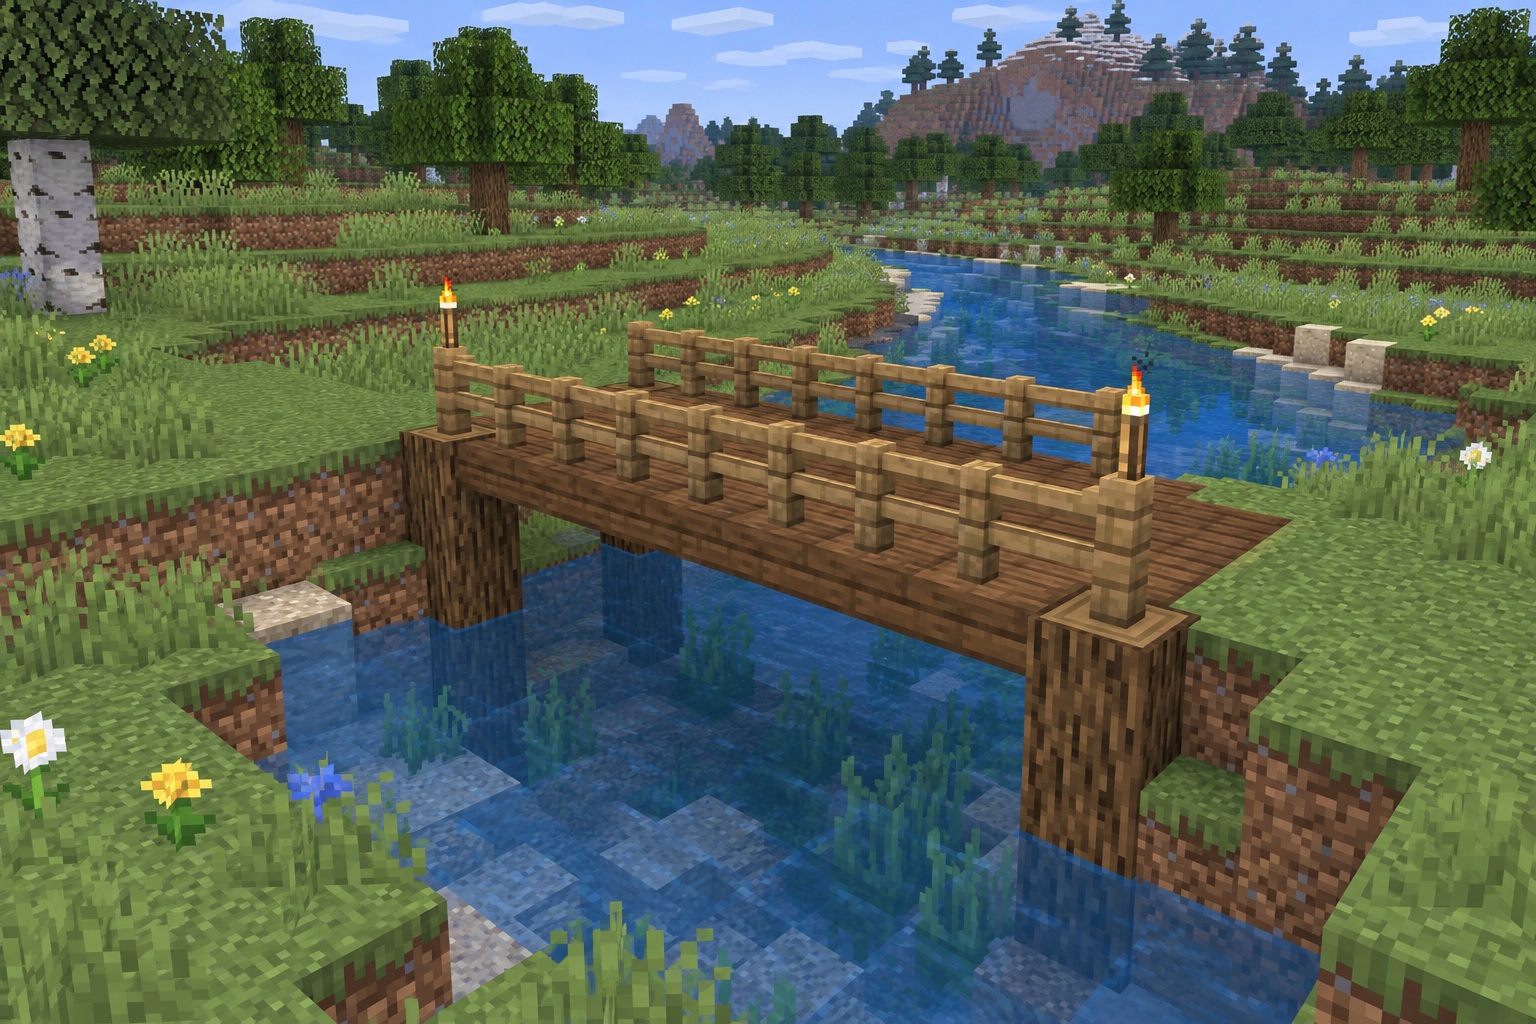
A short bridge can make two separate parts of a base feel like one place. This straight timber crossing works between a cottage and its fields, beside a riverside workshop, or along a woodland trail. Dark spruce planks define the deck, while lighter oak rails make its edges easy to read.
The footprint is 5 blocks wide and 9 blocks long, with a 3-block-wide clear walkway between the rails. The example spans a five-block-wide stream and overlaps each bank by two blocks. It uses full blocks and a level deck, so there are no stair orientations or curved spans to work out.
Use the numbered diagrams and coordinates for exact placement. The hero and gallery are AI-generated appearance references, not in-game screenshots or block-count diagrams.
Materials
- **45 spruce planks:** a solid 5 × 9 deck.
- **18 oak fences:** two uninterrupted runs of 9.
- **12 oak logs for the illustrated reference foundation:** four support columns, each 3 blocks tall below the deck. Adjust this count to your terrain.
- **2 torches:** on diagonally opposite railing ends.
- Temporary dirt blocks for working above the water; remove afterward.
- Optional dirt or other local ground blocks to level the approaches; quantity depends on the banks.
Counts are placed blocks, not raw crafting ingredients. Bring an axe and shovel. This is a walking bridge; the low clearance is not designed as a boat passage.
How to build
1. Set the height and lay the deck
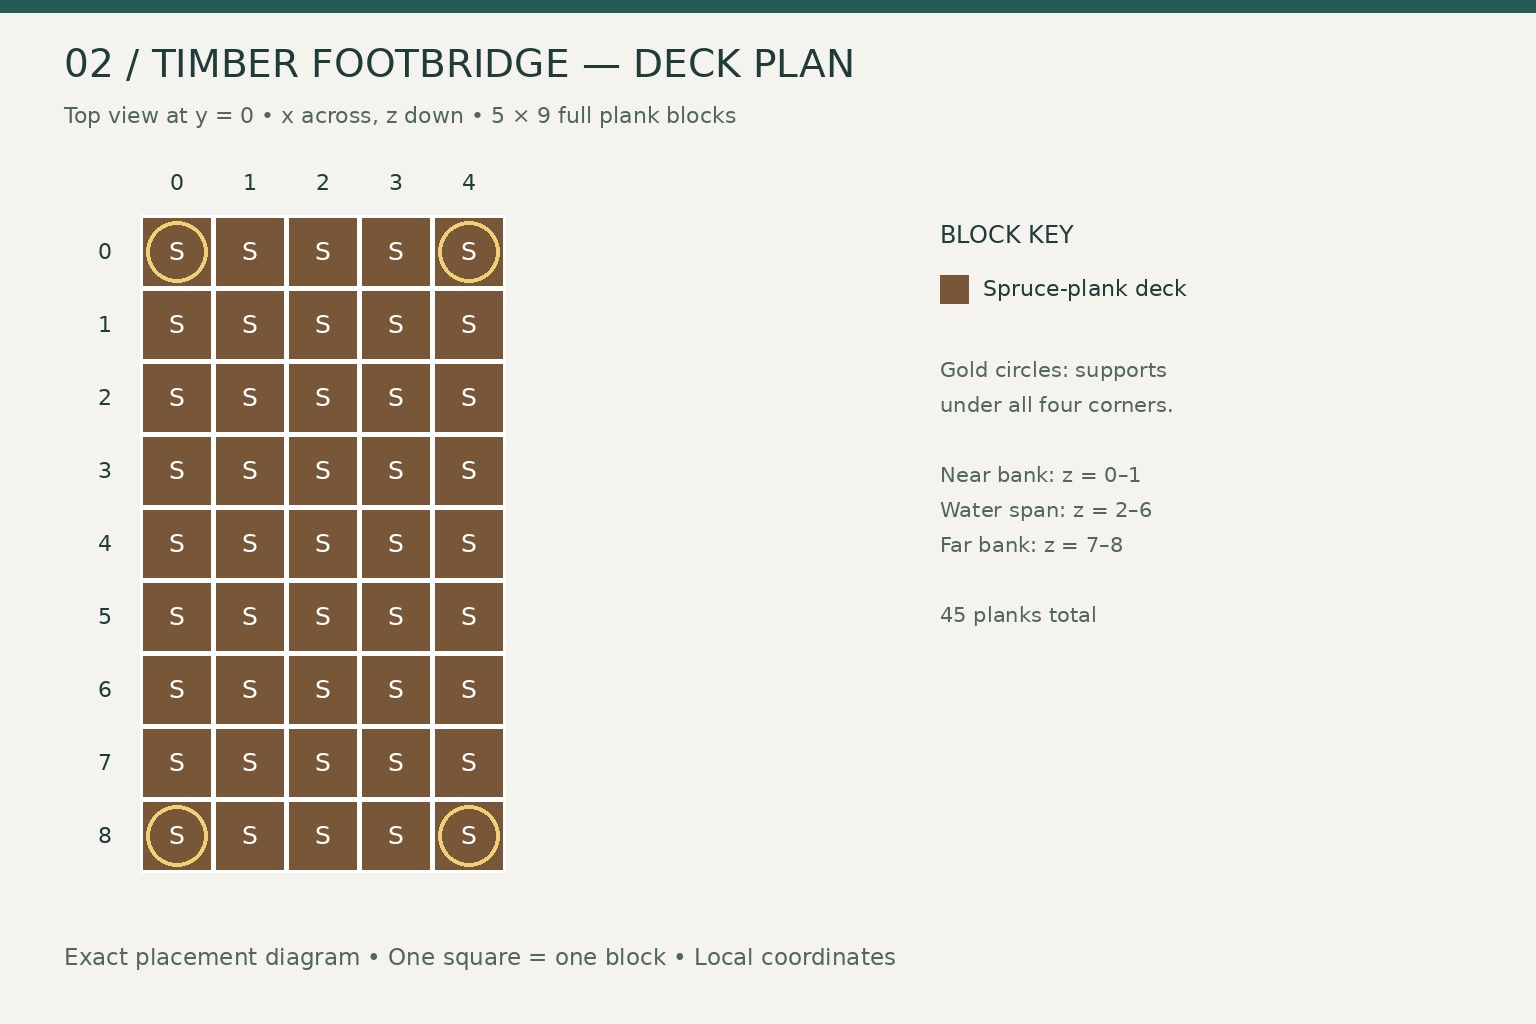
Choose a straight crossing with banks at similar heights. In this plan, x = 0–4 runs across the width and z = 0–8 runs along the crossing, starting at the near bank. The stream lies beneath z = 2–6; the first and last two deck rows overlap land.
Call the deck-block layer y = 0. For the reference layout, the water blocks are at y = -2, leaving the y = -1 layer clear beneath the middle span. The top surfaces of the approach blocks should be level with the deck's top surface, so you can walk straight onto it.
Mark the four support positions at (0,0), (4,0), (0,8), and (4,8) in x/z. Place vertical oak-log columns beneath these positions. The reference uses three logs per column, at y = -3, -2, and -1, with solid ground immediately below them. On uneven terrain, shorten or extend each column until its bottom rests on solid ground. Some logs may be buried in the banks; that is fine.
Fill the complete rectangle at y = 0 with spruce planks: five blocks across, nine rows long. Include a plank above each support. All deck blocks sit at the same height, and there are no gaps or steps.
Walk across before adding the rails. If either bank requires jumping, adjust the approach terrain outside the footprint until its walking surface meets the deck.
2. Add the rails and light the entrances
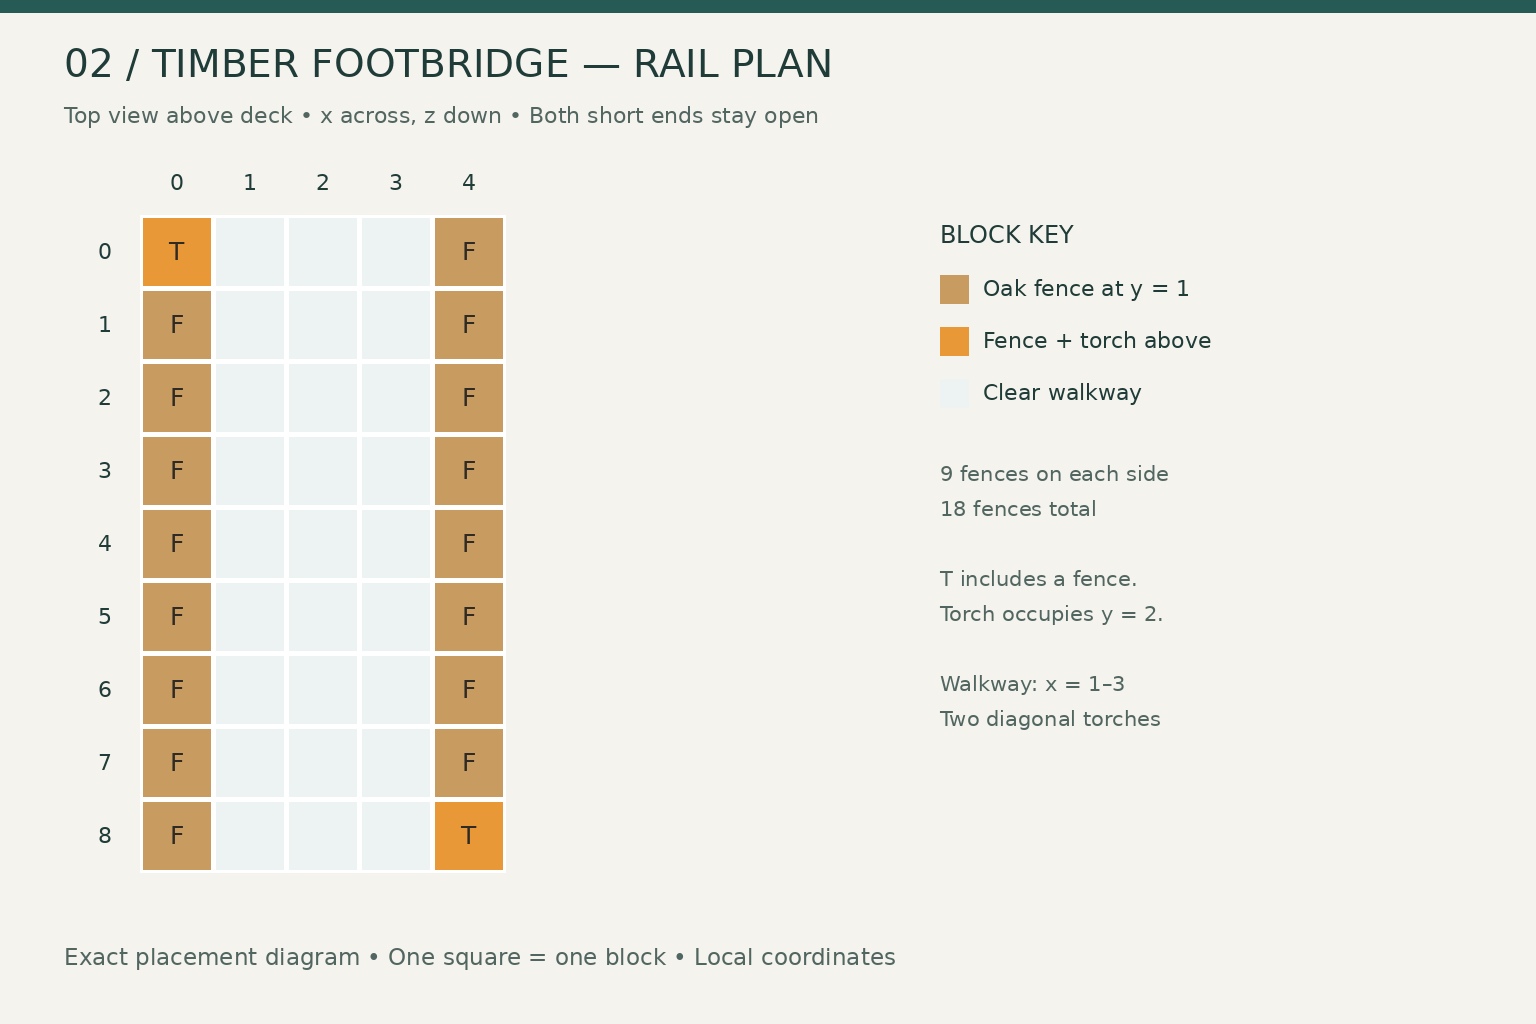
Place oak fences on top of the deck at x = 0 for every row from z = 0 to 8. Repeat at x = 4. The fence blocks occupy y = 1. Each side uses nine fences, for 18 total.
Keep x = 1, 2, and 3 clear along the entire crossing. Do not connect the railings across either short end: those openings are the entrances.
Place one torch on the fence at x = 0, z = 0, and the other on the fence at x = 4, z = 8. They occupy y = 2. The diagonal arrangement gives a light marker at each end without adding overhead beams or narrowing the walkway.
Remove all temporary blocks from the stream. Look along each side from the bank to confirm that the railing is continuous, then walk both directions to check that the entrances remain open. Blend a three-block-wide path into each end, narrowing farther away if it needs to meet a smaller trail.
Gallery
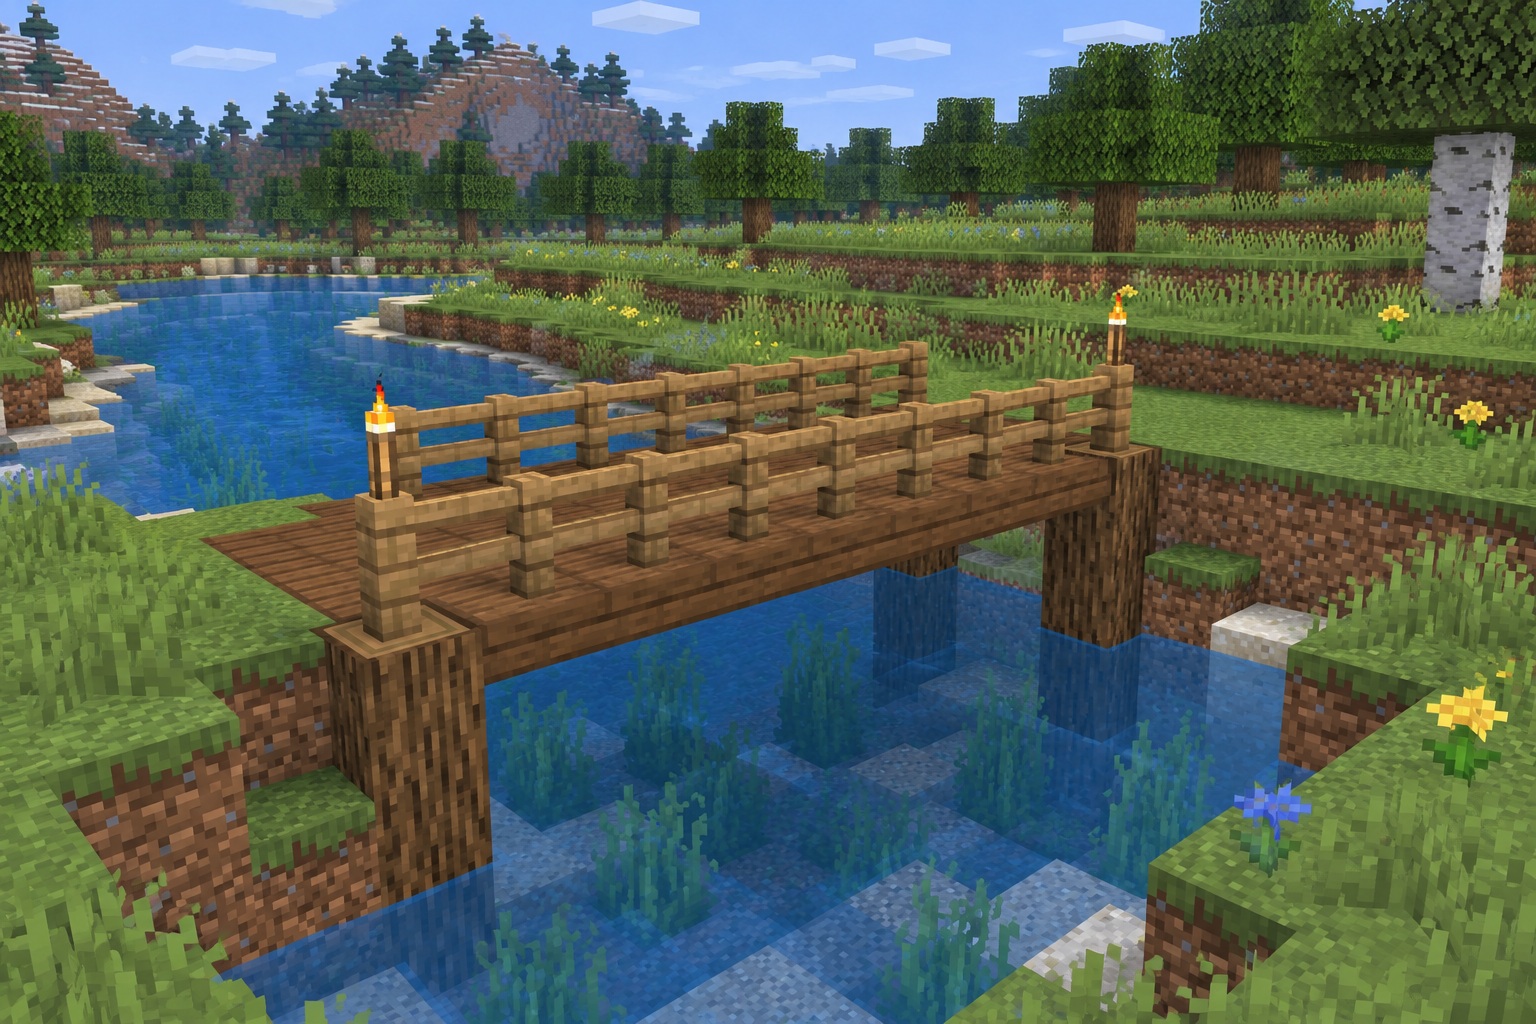
The side view emphasizes the low, straight span. Let the visible support length follow the banks rather than raising the entire crossing unnecessarily.
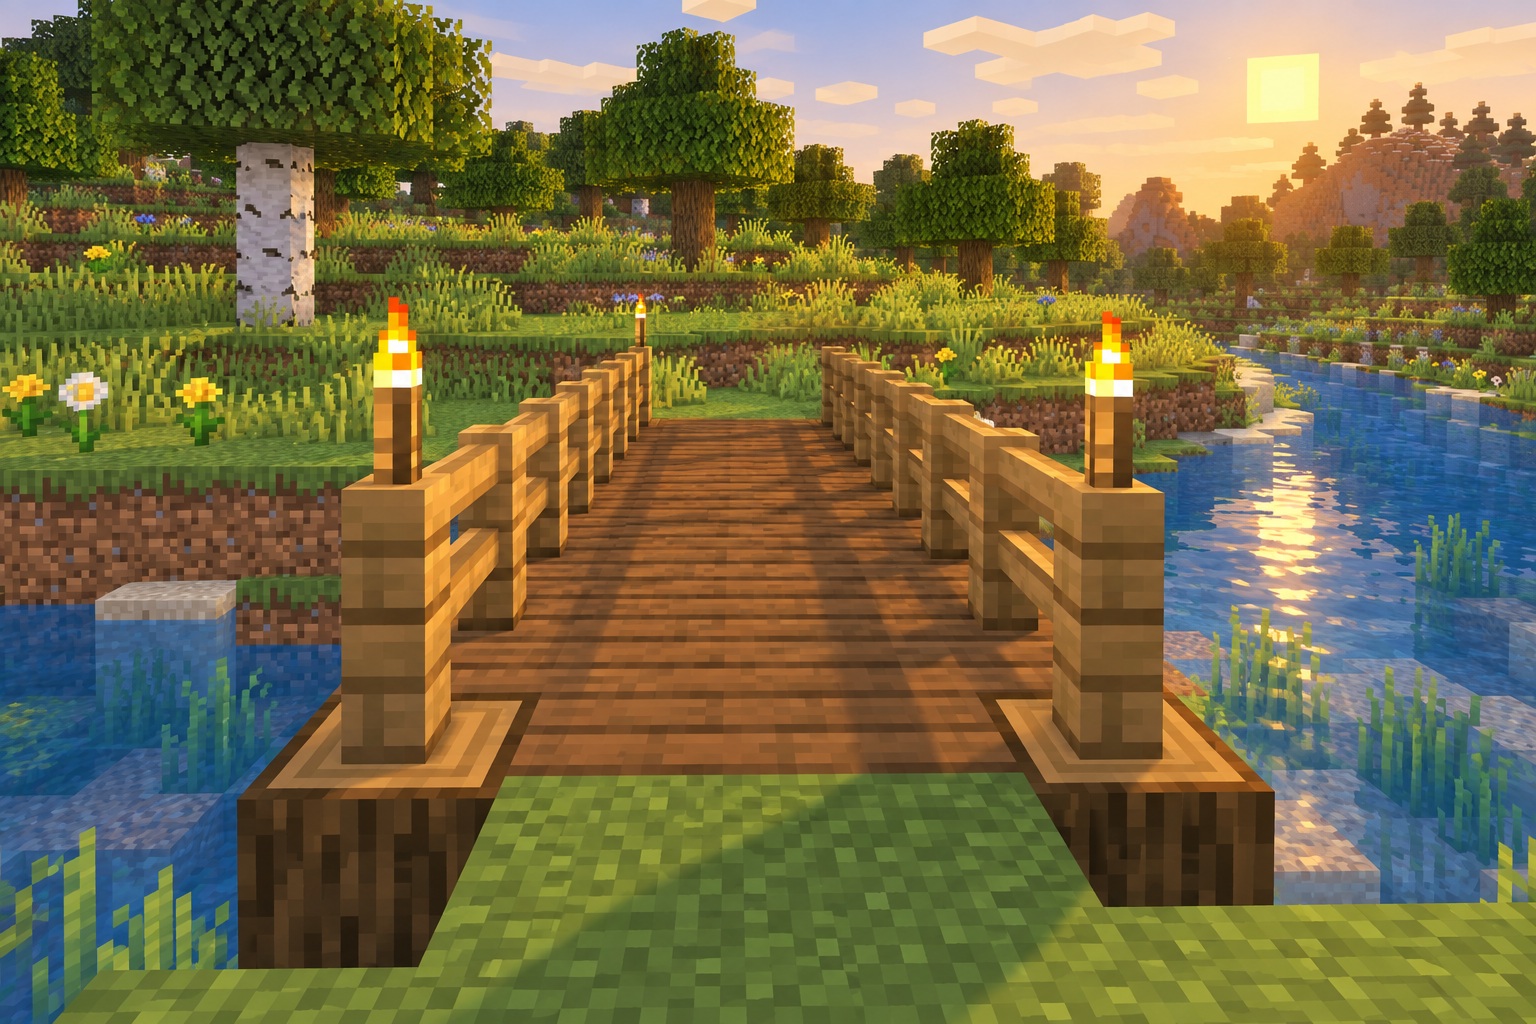
From the entrance, the clear central walkway leads directly to the opposite bank. Keep flowers and other decorations beside the approach rather than in the crossing.
Leave a note
Notes are submitted for moderation and are not published automatically.