22 Aug 2026 · 2 months ago
Village Blacksmith Workshop: An Open Minecraft Workstation Build
Create a compact masonry workshop with furnaces, an anvil, a crafting table, and a sheltered counter.
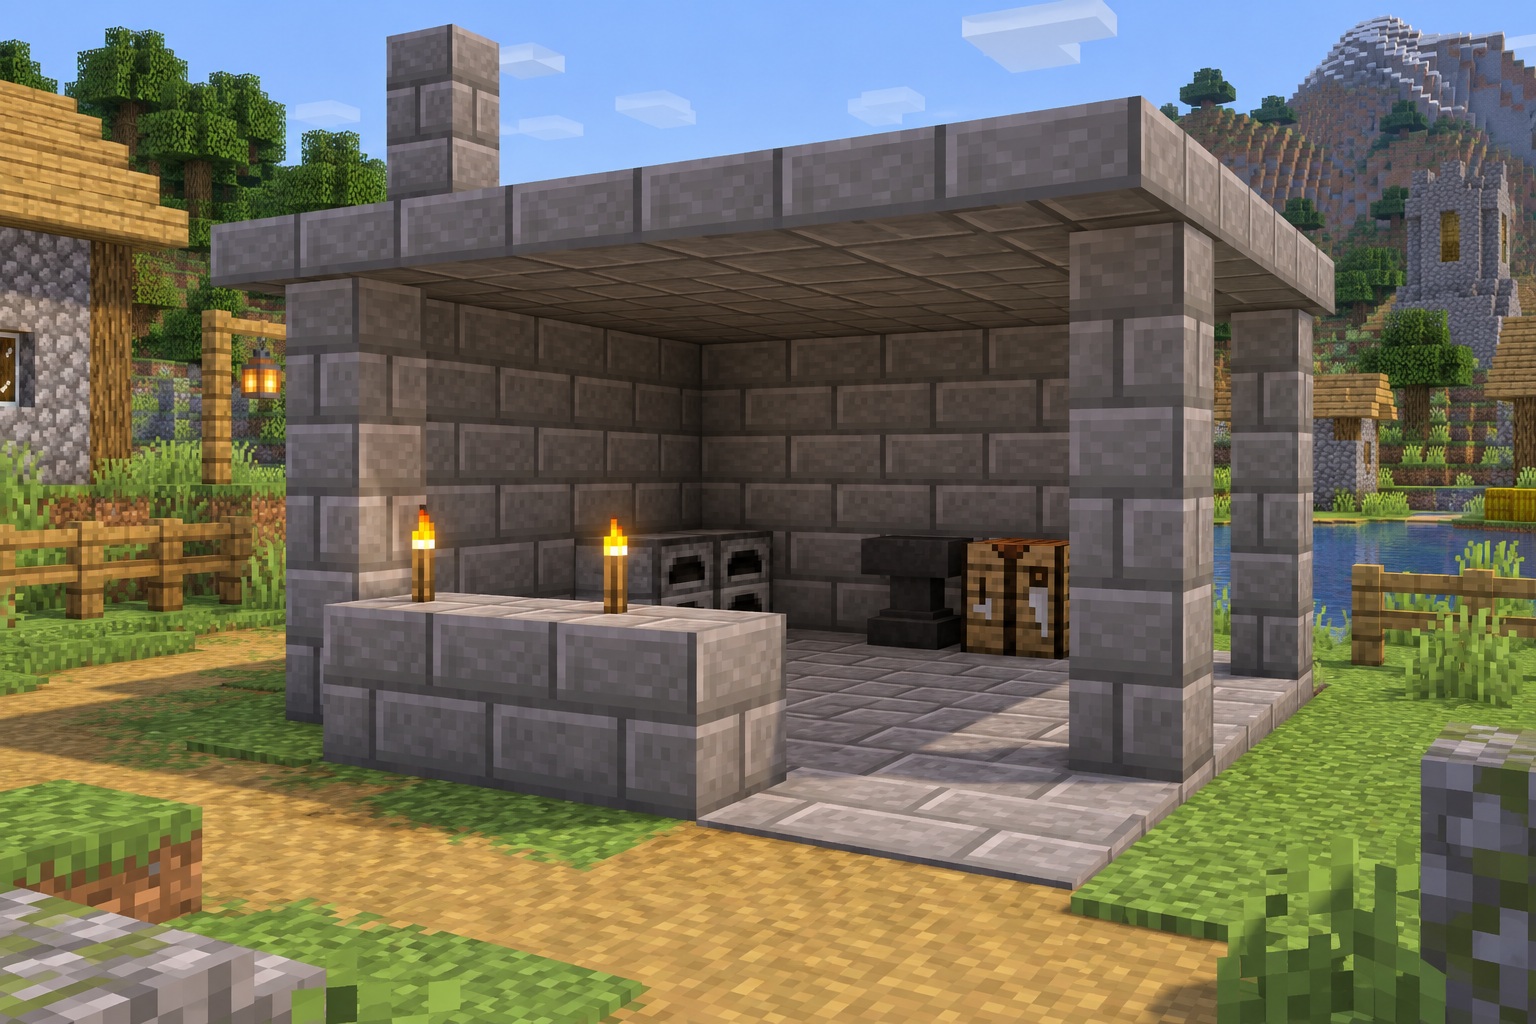
This blacksmith workshop puts everyday crafting equipment on display. A masonry counter faces the village path, while two furnaces, an anvil, and a crafting table sit along the back. The open front and right side make the space easy to enter from more than one direction.
The floor is 7 × 5 blocks, with a 9 × 7 slab roof. Three-block posts support the roof, and a small solid chimney gives the building a workshop silhouette. The chimney is decorative; the furnaces work independently.
The numbered diagrams define exact placement. Hero and gallery images are AI-generated appearance references, not in-game screenshots; proportions and small details may vary.
Materials
- **77 stone bricks:** 35 floor blocks, 12 corner-post blocks, 24 wall infill blocks, 3 counter blocks, and 3 chimney blocks.
- **62 stone-brick slabs:** the roof, excluding the chimney position.
- **2 furnaces.**
- **1 anvil.**
- **1 crafting table.**
- **2 torches:** on the front counter.
- Temporary access blocks for the roof; remove afterward.
Counts describe placed materials. Furnace fuel and supplies are separate.
How to build
1. Build the masonry shell and arrange the equipment
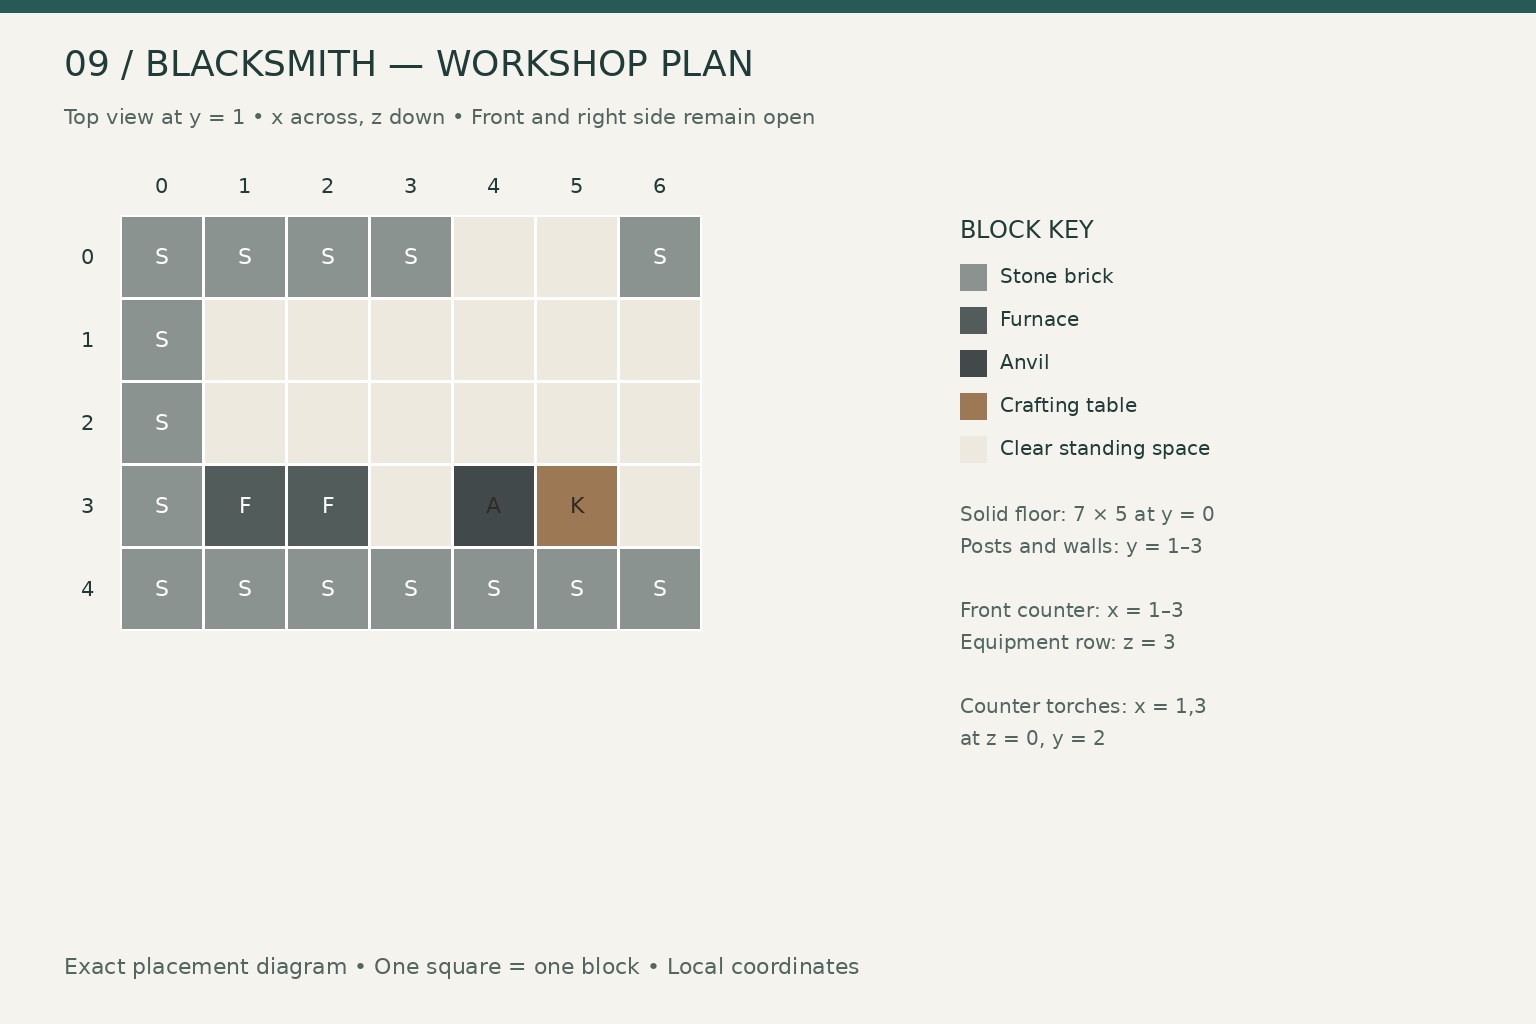
Face the workshop from the front. Use x = 0–6 left to right and z = 0–4 front to back. The floor is y = 0, with its top level with the path outside.
Fill the 7 × 5 footprint with 35 stone bricks. Build three-block-high stone-brick posts at the four corners, occupying y = 1–3.
Fill the rear wall between its corner posts at z = 4, x = 1–5, y = 1–3. That takes 15 blocks. Fill the left wall between its posts at x = 0, z = 1–3, y = 1–3, using another 9 blocks. Keep the right side and front open.
Place three full stone bricks along the front at x = 1–3, z = 0, y = 1. This is the counter; the front entrance remains open at x = 4–5.
At y = 1, z = 3, place furnaces at x = 1 and 2, an anvil at x = 4, and the crafting table at x = 5. Face the furnaces toward the front. Leave x = 3 in that equipment row clear, along with the central standing space at z = 1–2.
2. Lay the slab roof and add the chimney
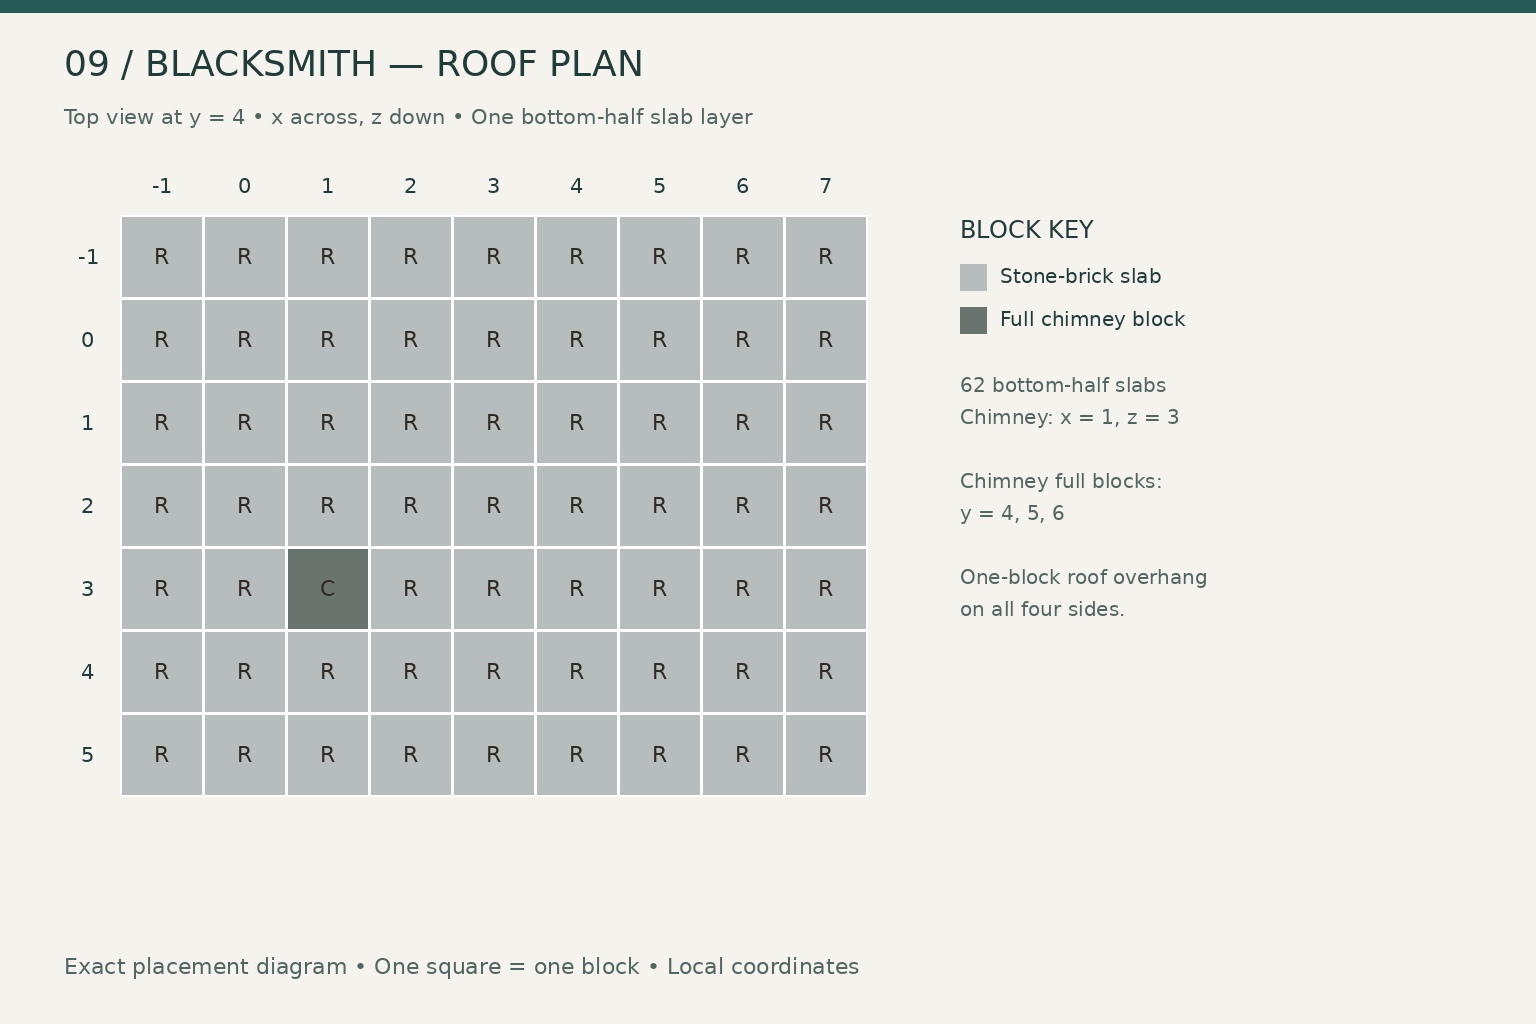
At y = 4, cover x = -1–7, z = -1–5 with bottom-half stone-brick slabs, except at x = 1, z = 3. There are 63 positions in the rectangle; the chimney exception leaves 62 slabs. This creates a one-block overhang around the floor.
At the reserved chimney position, stack three full stone bricks at y = 4, 5, and 6. The first replaces a roof slab, and the other two rise above it. Keep the chimney one block wide throughout. There is no shaft to excavate through the furnace or rear wall.
Place torches on the counter at x = 1 and 3, z = 0, y = 2. Keep the counter's middle top cell clear.
Remove temporary access blocks and enter from both the front and the right side. Check that you can reach each furnace, the anvil, and the crafting table without climbing onto the counter. A short path in front and a small work yard on the right are enough to connect the workshop to a village.
Gallery
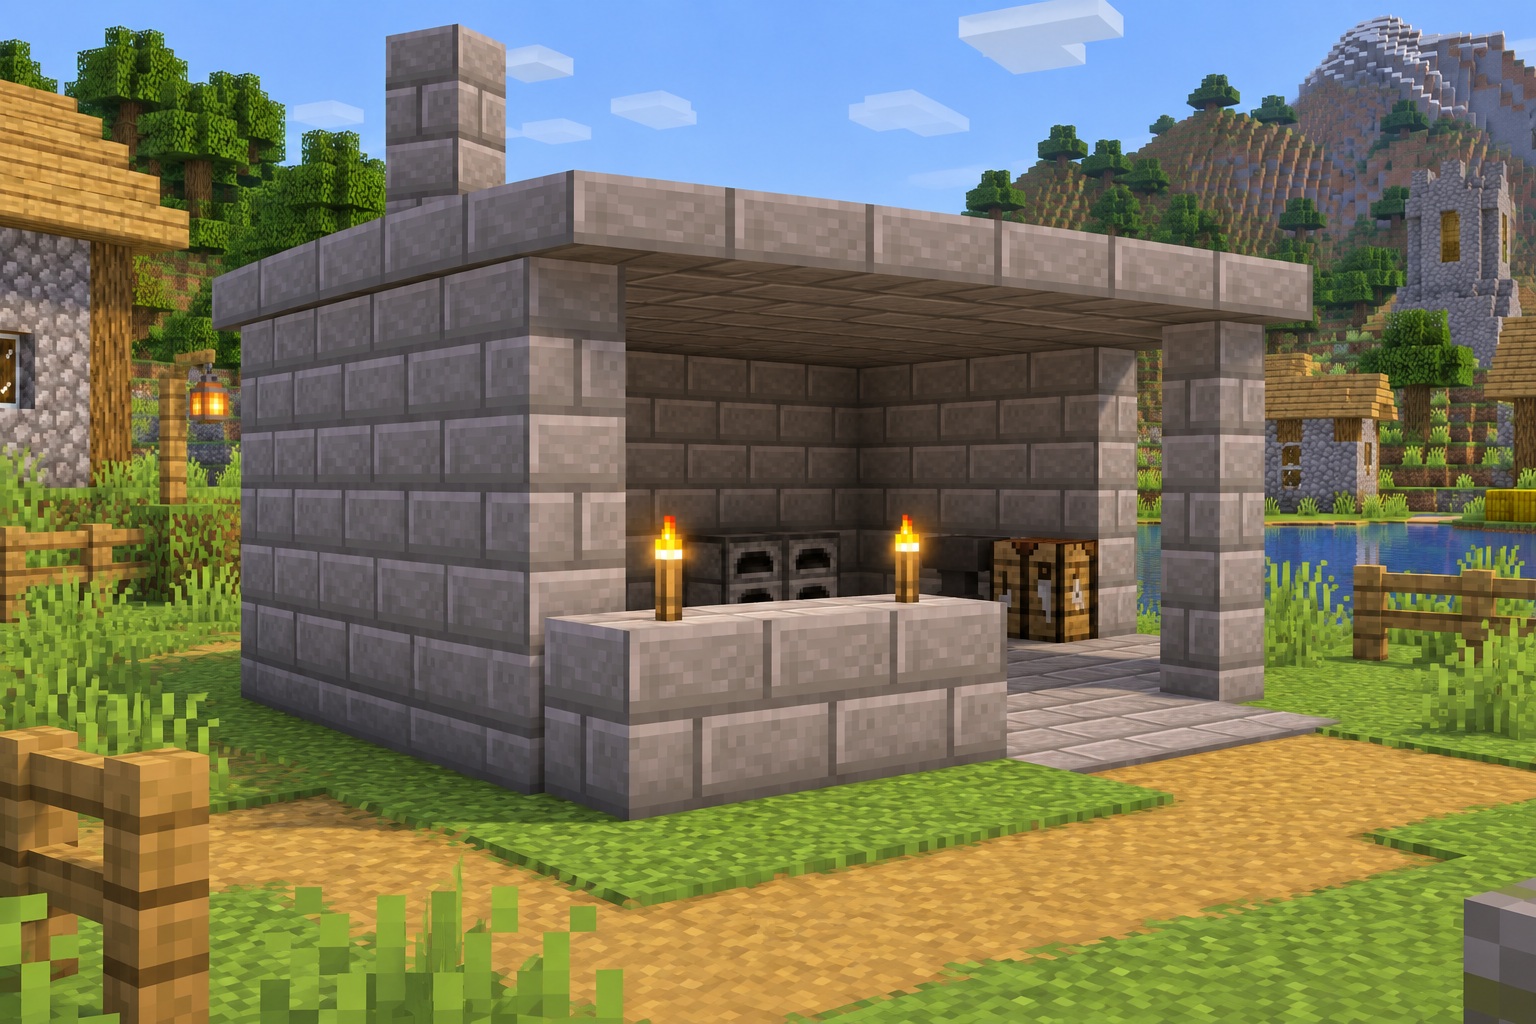
The solid left side gives the open workshop a clear back and sheltering edge.
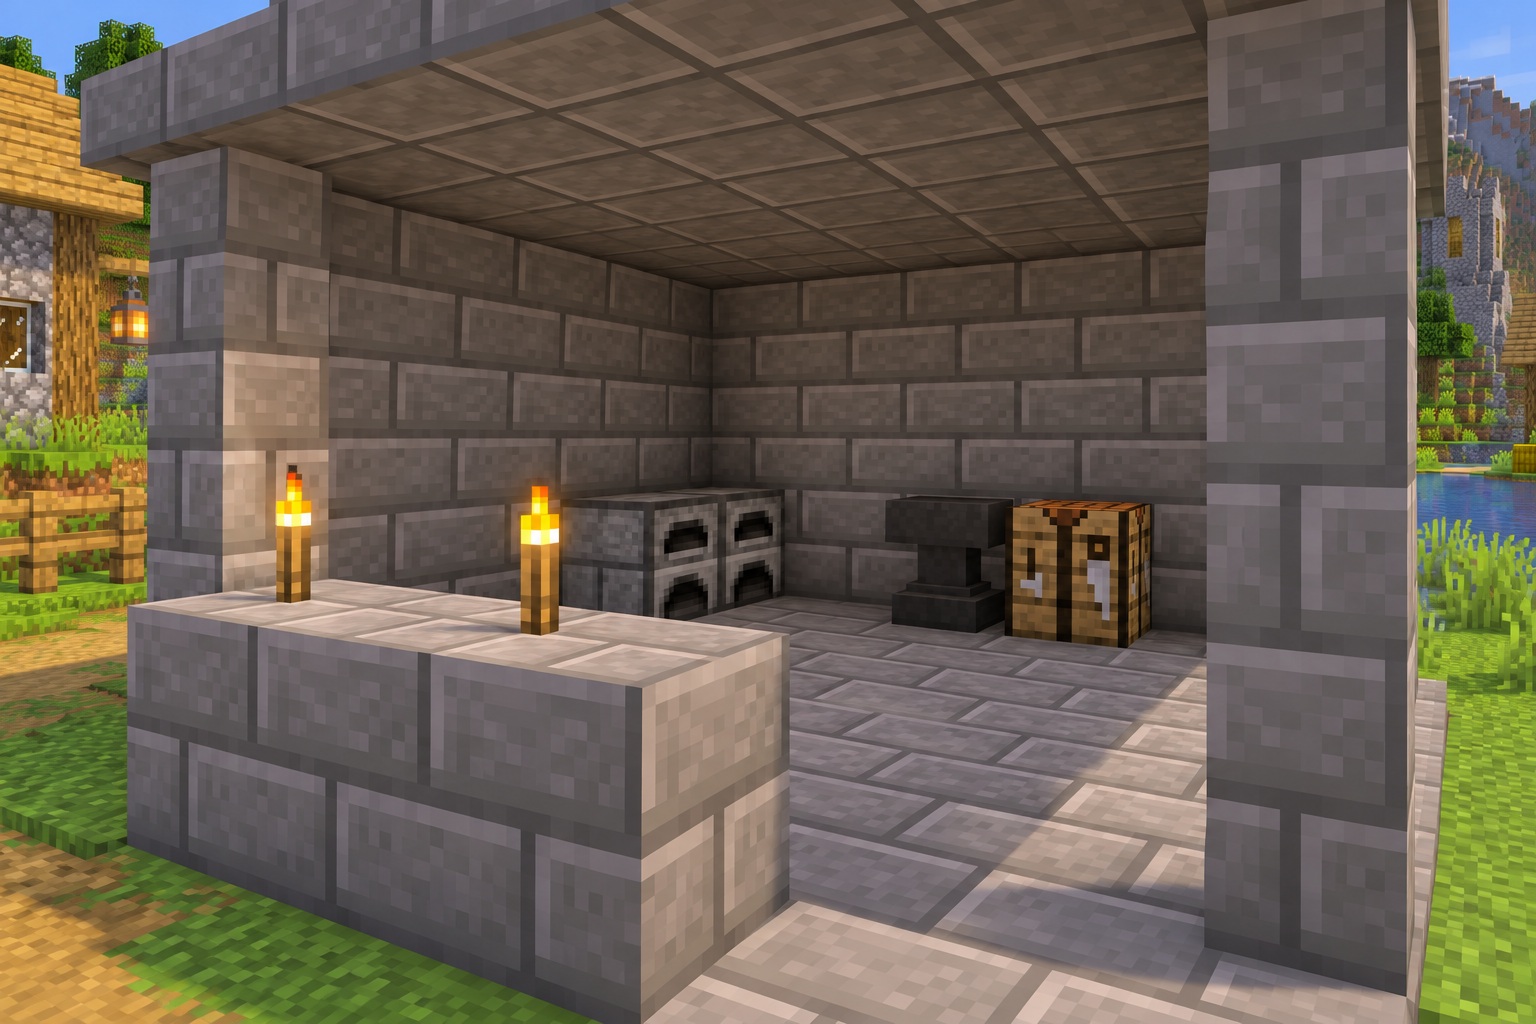
Keeping the equipment along the rear leaves the middle usable even in a small footprint.
Leave a note
Notes are submitted for moderation and are not published automatically.